Remembering ICQ: A Page Out of History

I got onto ICQ very early in its life, around 1996 or 1997, with a 6-digit UIN (298387 — sadly stolen years later). I loved it, it’s how I stayed connected with family and friends, how I met new people, how I connected on the Internet at a time when the Internet was trying to figure out what communication and community looked like.
Years later I became a developer in the IM space working on Gaim/Pidgin, which supported ICQ and a myriad of other services. Looking back, seeing the evolution from ICQ to services like AIM and MSN to modern chats like Discord and Slack, there really hasn’t been a system truly like it since.
The pager model was quite different from what IMs evolved into. There was less a focus on “chat with me right now!” and more of a “I’ve sent you a message, get back to me with a reply when you can.”
The reliance on modems and limited internet time was clearly a factor in that design.
And really, it wasn’t so much that IM systems that came after that were an entirely different paradigm. It really just came down to the UI choices. With nearly all IM clients, when a person messaged you, a window popped up. With ICQ, you got a little “uh oh!” sound and a blinking icon in your ICQ window, and could choose to deal with it at your leisure.
That difference may seem small, but significantly changed the expectations around conversations. When an IM is in your face, you have to make a choice right then: Respond, or dismiss. Either way, it stole your attention away from what you were doing, and like a salesman handing you a product they want you to purchase, you feel a sense of obligation to engage.
The ICQ model was different: There’s a message waiting for you, and when you’re ready and available, you can choose to deal with it. You didn’t even see the contents of the message until you were ready, so there’s no guilt-driven drive to respond when a message came in. No “Well I guess I can answer this question real quick…” Don’t want to see anything at all? Just close or minimize the window, come back later.
If you wanted an actual live chat with rapid responses, you could do that, but it wasn’t the default. It wasn’t the expectation.
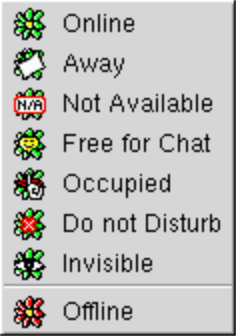
Today, you may be used to setting “Away”, “Not Available”, and “Do Not Disturb” statuses, and even going “Invisible”, but how about “Free for Chat”?
These days we deal with demands on our time all throughout the day. Notifications on our phones designed to draw our attention. News alerts that reach for emotional reactions. Incoming text and chat messages on a dozen services, all with snippets of a text that make you want to read the rest and then maybe respond before you forget.
There really isn’t incentive for services to adopt the ICQ model so much these days, as everyone’s competing for your attention, but the passive nature of messages and notifications that was part of the original ICQ could be a lesson in how to build software that helps keep people connected, while also letting us claw back control of our own time.
Early ICQ was unique. It’s changed over time, adopting to modern trends, newer protocols, and even new owners. The ICQ of today isn’t the same ICQ of 1996, that’s for sure (but surprisingly, your 1996 UIN would still work today). Still, it’s sad to see it go after almost 28 years, even though it’s not the same service it once was.
It’s been heartening seeing how many people remember it fondly. I know for me it helped set my life on a course of events that led to my involvement in a major open source project, then to my first job in the tech industry, and then to my first real company.
The service may be gone, but it won’t be forgotten. Not only are there lessons to learn from the way ICQ tackled communication and agency online, but there are, it turns out, enthusiasts working to bring it back:
- The NINA and Escargot project (Twitter) is building their own ICQ server, fully compatible with ICQ clients, and the Discord has been flooded with people looking to discover ICQ for the first time or rediscover it all over again.
- Pidgin still supports ICQ through third-party plugins.
And though I haven’t found one yet, I do hope that someone will recreate the original ICQ experience in some form. Or better, take what ICQ did well and think how we might learn from it when designing the interactions of today. I for one wouldn’t mind a simple, casual, and non-invasive approach to communication again.
Remembering ICQ: A Page Out of History Read More »